
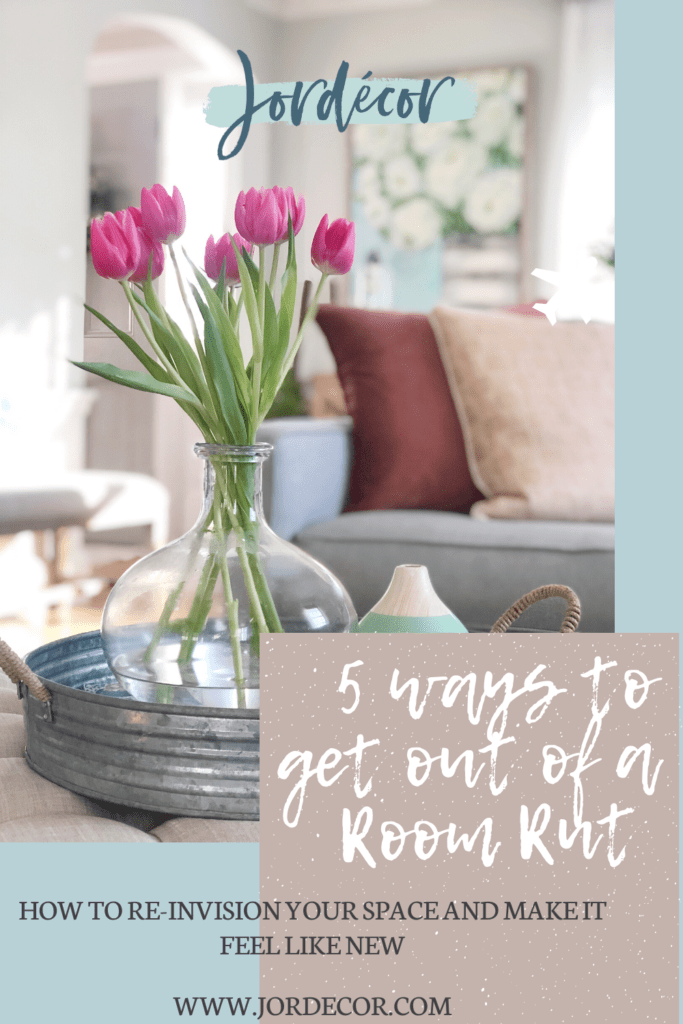
Our House

In light of everything going on, many of us are now working from home and spending much more additional time in our spaces. In this post I want to share 5 tips to help you spruce up your space and get you out of your Room Rut. It’s now been several weeks of our new normal which has been social distancing to help stop the spread of the global pandemic Covid-19. Does several weeks of self-quarantining at home have you looking around at the state of a room and feeling blah about it? If so, you may be experiencing Room Rut. The good news is you don’t necessarily have to run out to the store or even buy all new stuff online to get you out of Room Rut. So here are my tips to help you!
Tip 1: Edit
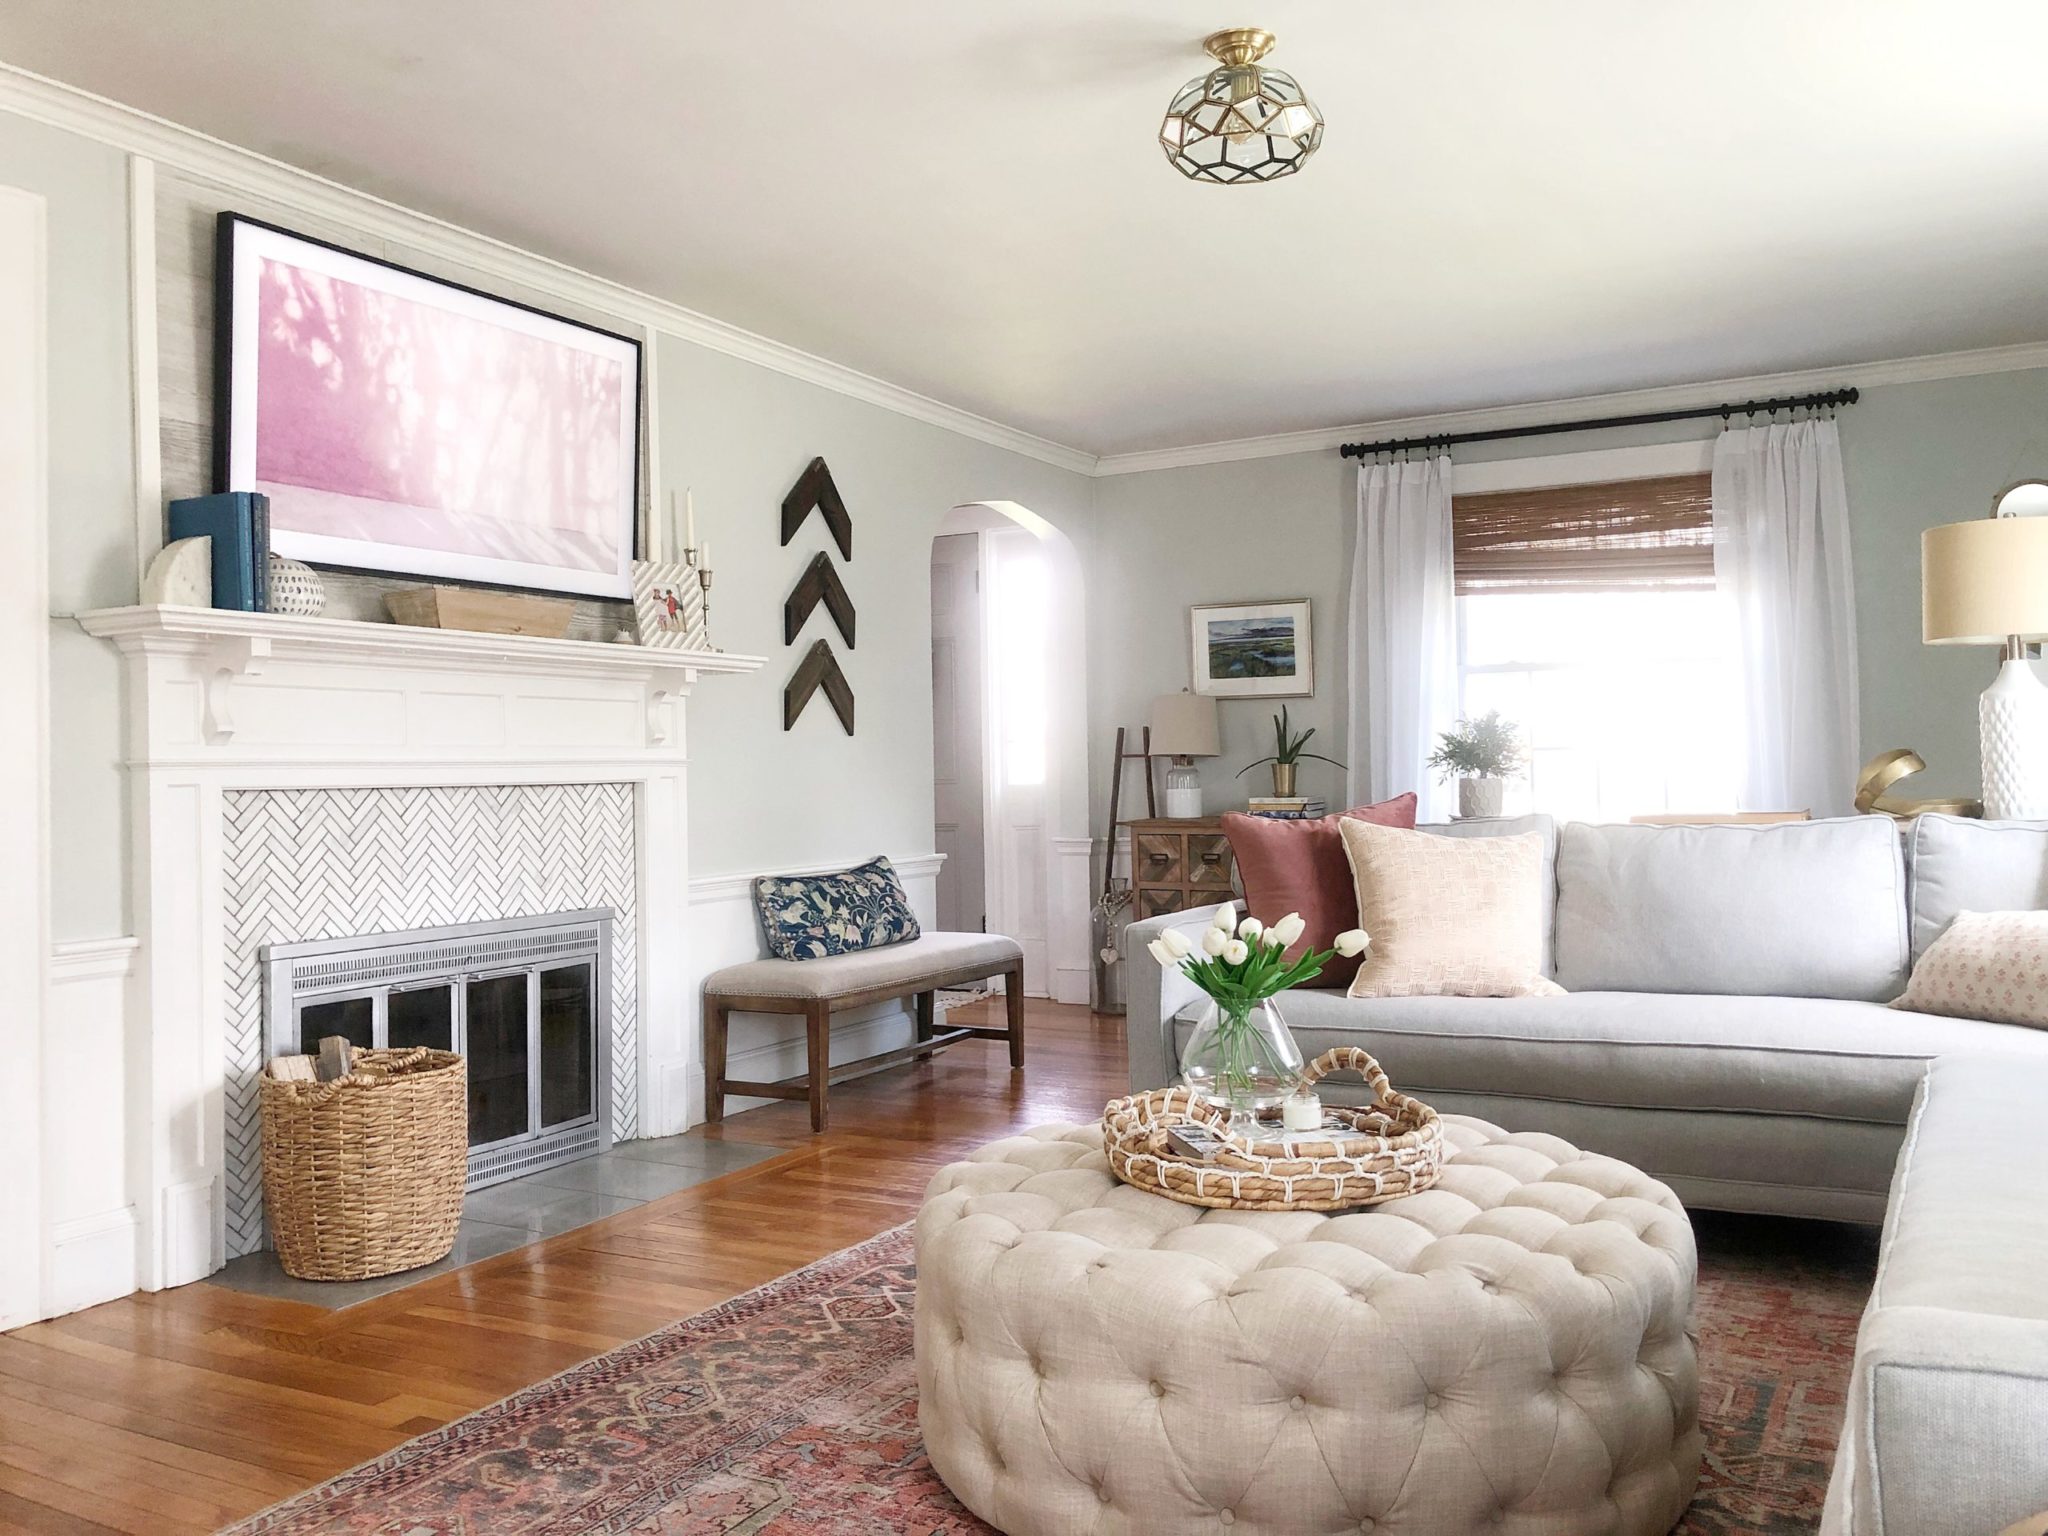
First thing first, whatever room is getting to you, you need to start by editing it. Editing simply means cutting out some of the items you are looking at and remove them from the design equation. A blank state is the perfect way to start easing out of your Room Rut. For example, if you are sick of your media cabinet, book shelf or coffee table styling. Completely remove everything from the surface so it is empty and let it breathe.
Sometimes you need to clear things out to start thoughtfully bringing in new or existing pieces. For example our coffee table ottoman was needed a little mix up. I changed my metal tray to a woven tray, swapped the vase and adding a new candle. That was all that little nook needed to feel refreshed.


It’s a very simple example of editing and then rearranging some items which is the next tip.
Tip 2: Rearrange
The next tip is rearranging. I’ve been rearranging furniture since I was a kid. Whenever I would get bored with my bedroom I’d change the layout. Switching around some chairs/tables might be just what you need to breathe new life into your room. You might be constantly gazing into your office at a bunch of open shelving and not really liking their presentation, maybe too much clutter or uninteresting stuff on them. So first try Editing, clear it all so it is empty then begin rearranging some items or even larger pieces like rugs/furniture. Mix up that vase and add some extra books, find another object that works on a different shelf with maybe something else you find from another room. Rearranging can help your eyes visualize the space in a new and unexpected way, thus giving the room a feeling of newness.

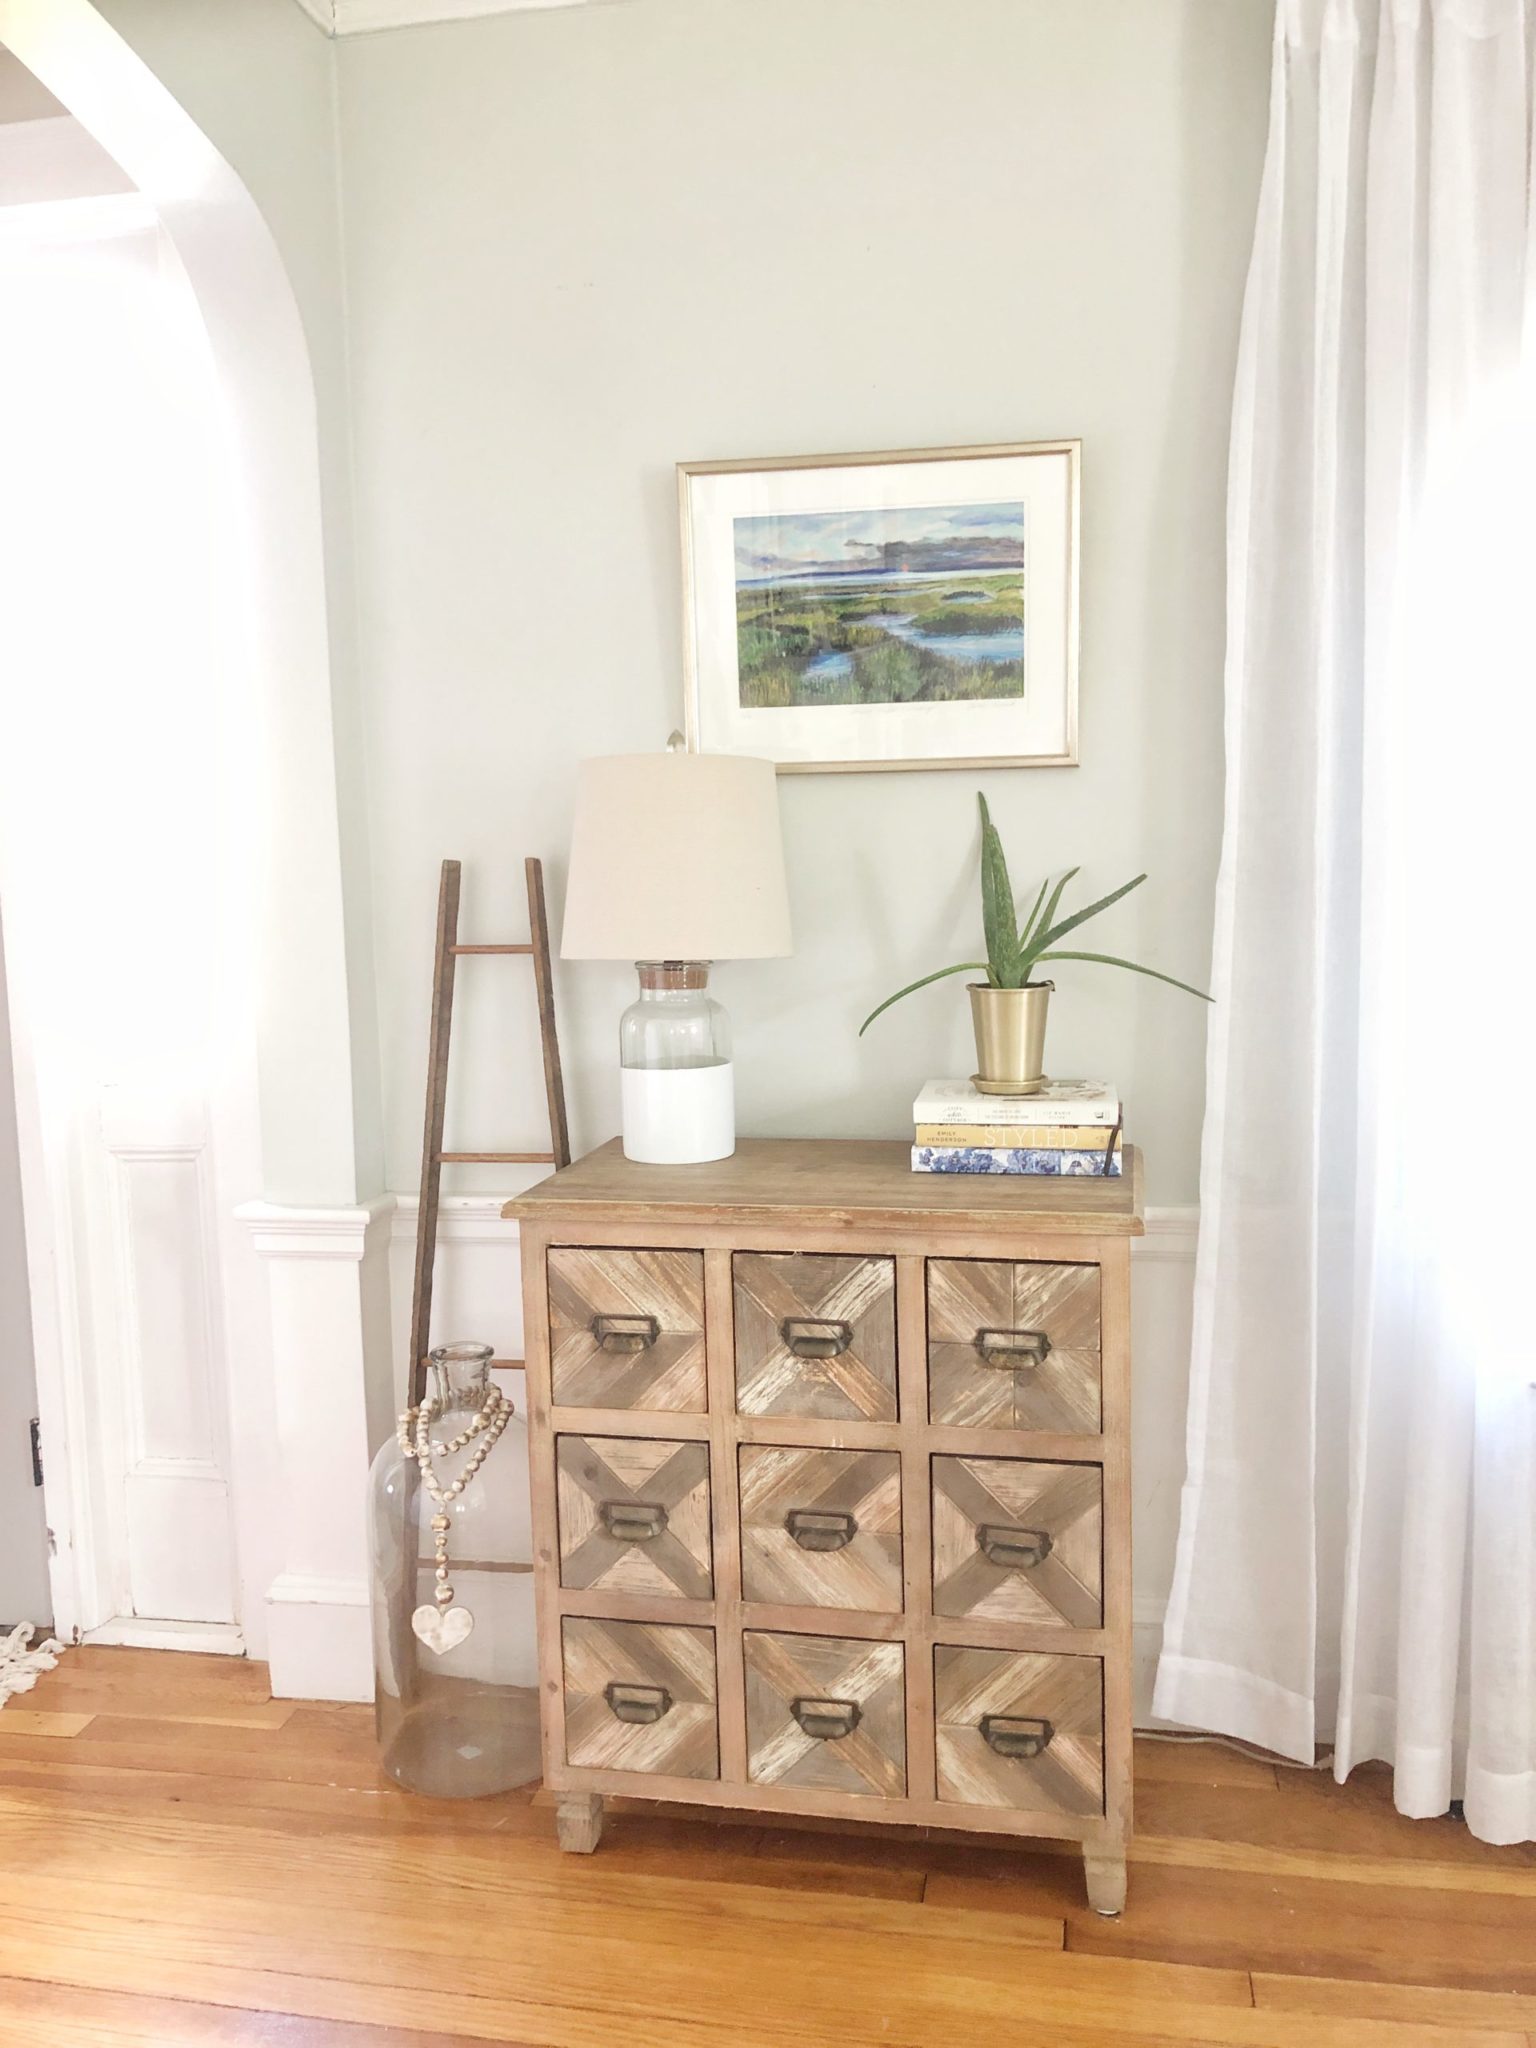
In this area swapping art, lamps and decorations, such as stacked books and plant; give this corner a new look!
Tip 3: Re-inspire & Re-imagine
Sometimes you just need to get the creative juices flowing. Whenever I need a little jolt of ideas for a room I go to my favorite place for visual resources –Pinterest! I love searching for rooms/areas and getting inspired by other’s designs to reinvent my own. For example, if I’m feeling bored with my kitchen island decor, I’ll go on Pinterest or my favorite design publication and search “kitchen decor” or “kitchen Island” to jump start some ideas. Then I’ll see what I can find at home to recreate my own version of the same look. This is where the next step comes in. It’s also good to look at your room and think is there something specific in this space that is bothering me. Is it a dated lamp, the color of a side table, the style of rug. Try to identify the issue if you can, if there is a specific item that is bothering you. If so, can that item be reimagined with a can of spray paint or a gallon of chalk paint? Switching up that one dated or no longer your style item just might be what the space needs to feel fresh!
Tip 4: Shop Your Home
Once you have done a little editing, rearranging and re-inspired your space if you are still in need of a little something, it’s so fun to stretch those creative muscles and shop your home. I keep seasonal and some extra decor items in my basement to swap from time to time. If you don’t have a decor stash like I do, try wondering your home and select different decorative items like faux plants, wall decor like art or mirrors, lamps, books and mix it up!

Tip 5: Thoughtful Purchase
If after all the above steps haven’t pulled you out of the “room rut” and you aren’t able to invest a lot of money first try local thrift stores or Facebook Market place (once social distancing ends of course). However, if it is time to invest on an item that will take you out of “Room Rut” make it thoughtful! Order something that you really LOVE or have been wishing, it will be worth your investment. That first step editing will really help you eliminate whatever is keeping you stuck in Room Rut. Sometimes that one special/thoughtful purchase mixed with the other tips; rearranging your current items, re-inspiring your room, re-imaging something old, is really the magic combination to get you out of Room Rut for good.

I hope these tips help you during these challenging times. Your home should be your happy place and as always I’m here to help you get it to that place. Now is the time to play around with your space, move furniture, drag that rug from one room to the other (I’ve sooo done this) spray paint some lamps or paint an old dresser. Small changes really do add up to big results!
Happy Decorating!
Jordan
Shop the Decor:

Pin for Later:
read the full post >
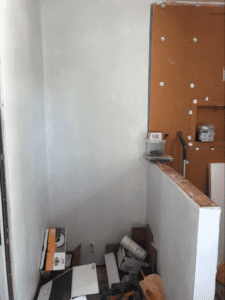
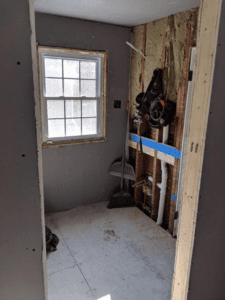
Hey Friends! We are about halfway through our summer bathroom renovation, which is good timing because we are about half way through summer. My goal was to have everything back to normal (ish) by the time school starts in September. If you didn’t see on Instagram in early July we gutted our one and only full bathroom and are converting our old master closet into a master bathroom! So far it’s been going smoothly. We have an amazing contractor that is kicking butt and moving the project along! We have GC’ed our own projects before, like when we did a basement over at our first home but now with two kids and busy work schedules we knew we needed someone that could handle all the permits and all the sub contractors. Plus, all the unforseen issues that can come up when renovating an older home.
This week the walls are going up and the plaster is being done. So far all the permits have passed and the rooms are really starting to take shape. As we move closer to the plaster phase and the tile phase I know the choosing paint color phase is also getting closer. I’m gitty with excitement to finally have updated bathrooms AND our own master bath! Sharing a bathroom with two growing kids was getting a bit challenging (to say the least).
UPDATES:

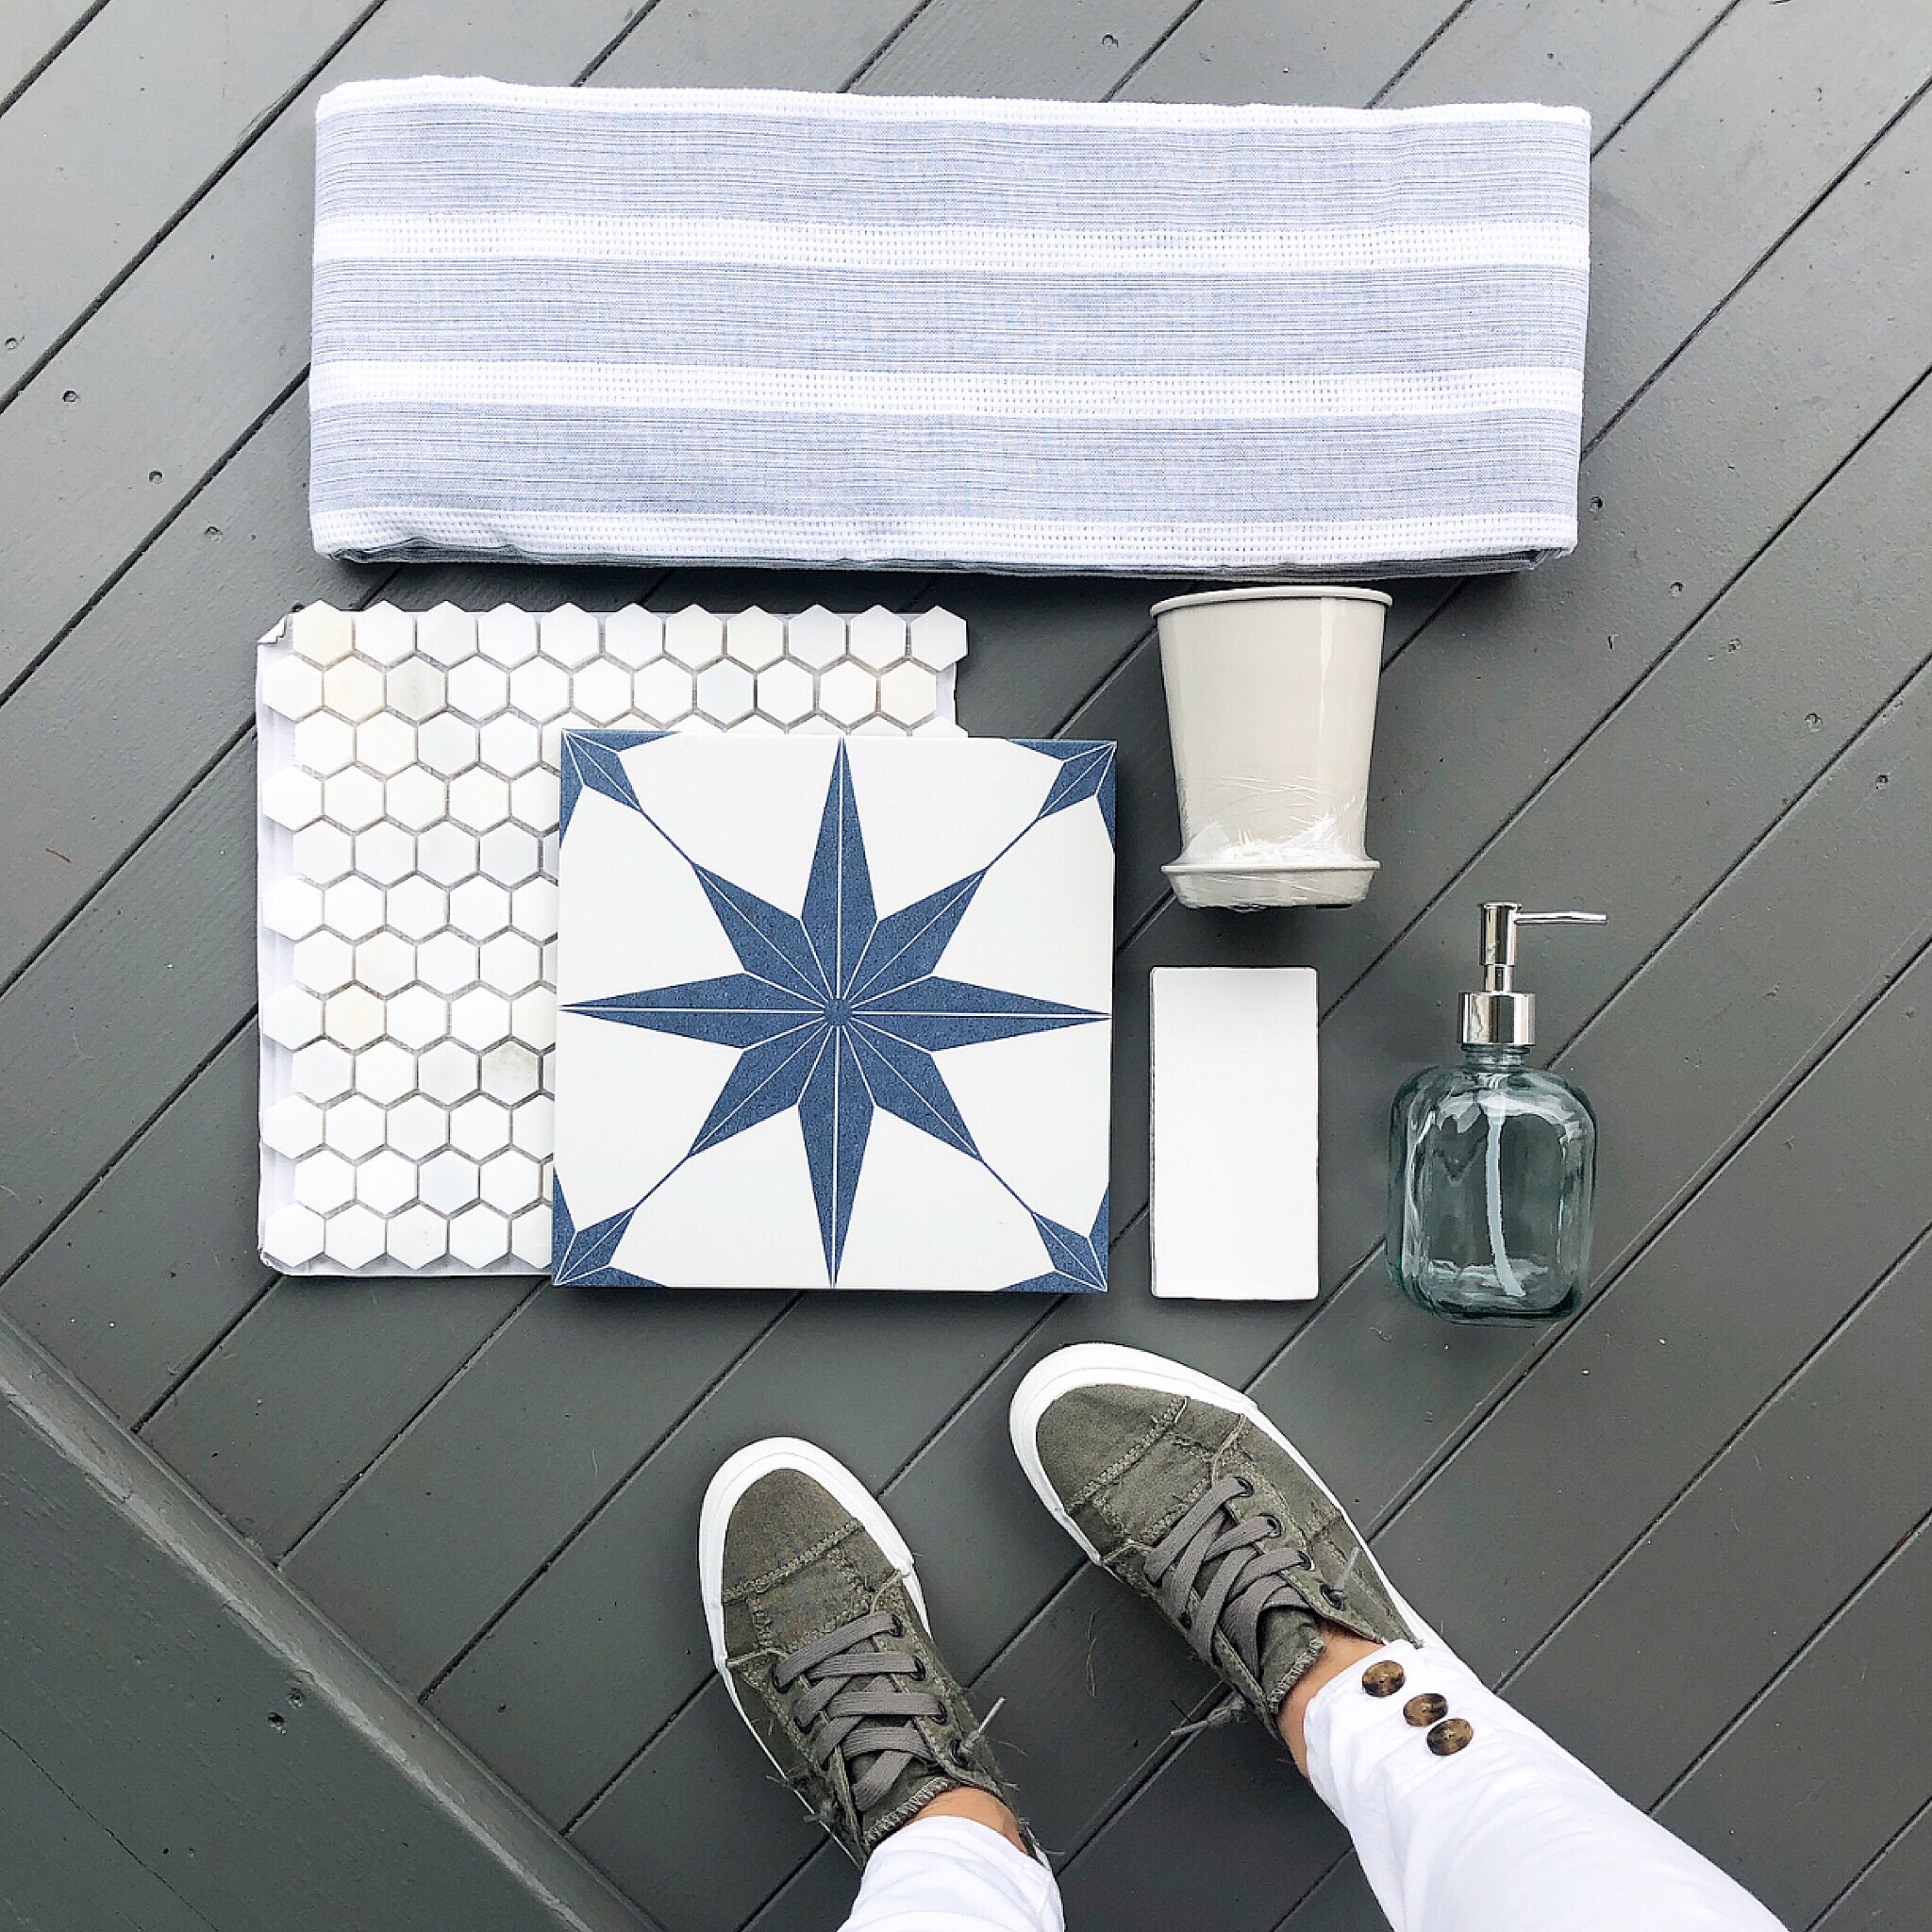
Kids Bathroom Tile:
All the tile for the bathroom projects are from Merola Tile which can be found at Home Depot and I’ll link them below for you so you have the names for them. The kids bathroom will feature this cool navy blue start pattern on the floor, an organic looking subway tile and then a hex pattern inside the niche wall. I’m going to bring in other touches of blue with accessories, some flat black in the vanity light and wall hooks as well as chrome finishes.

Master Bathroom Tile:
The tile for the master bath is a bit more sophisticated and timeless. My goal and vision for our bathroom was to create a luxurious feel in a small bathroom. To accomplish this I choose statement fixtures in champagne bronze (which I’ll link again at the bottom of the post) and then I will mix in some polished nickle in the vanity light and faucet. Both of those finishes have warm tones so they will mix together very nicely! The tile is neutral and I plan to keep the color scheme neutral as well to let the tile be the focal point. I chose this beautiful design for the floor and the scallop for the shower walls with a soft gray grout to keep the design subtle. A simple white penny for the floor with dark gray grout colors to carry in that contrast from the field tile.

Bathroom Wood Accent Inspiration:
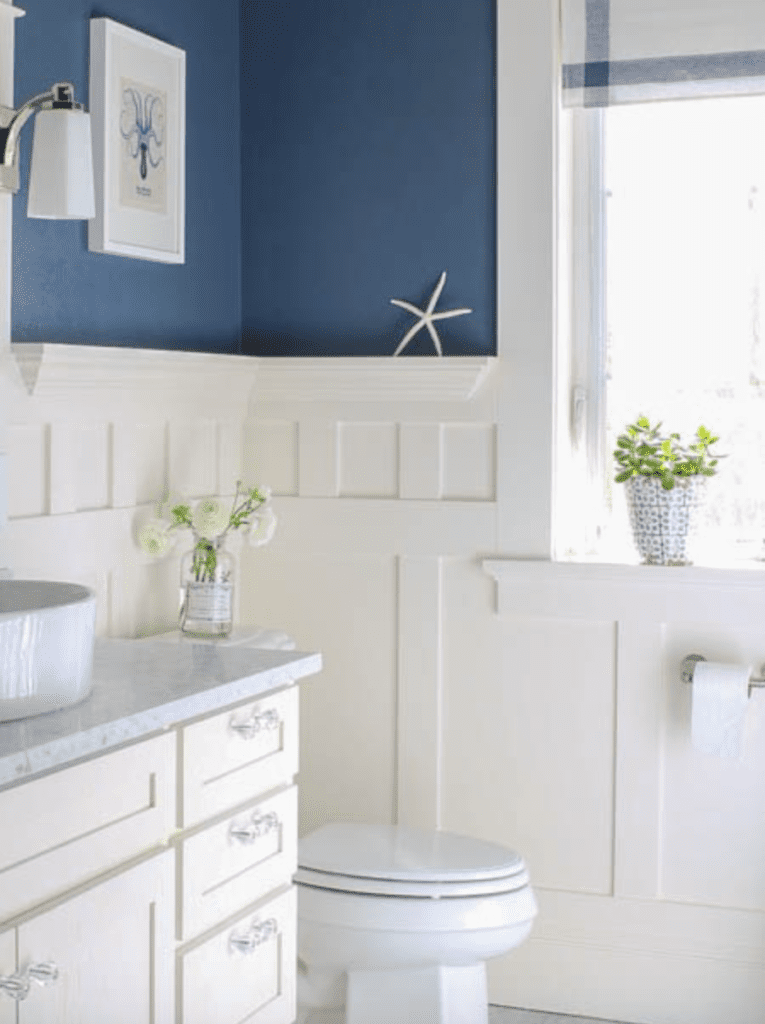
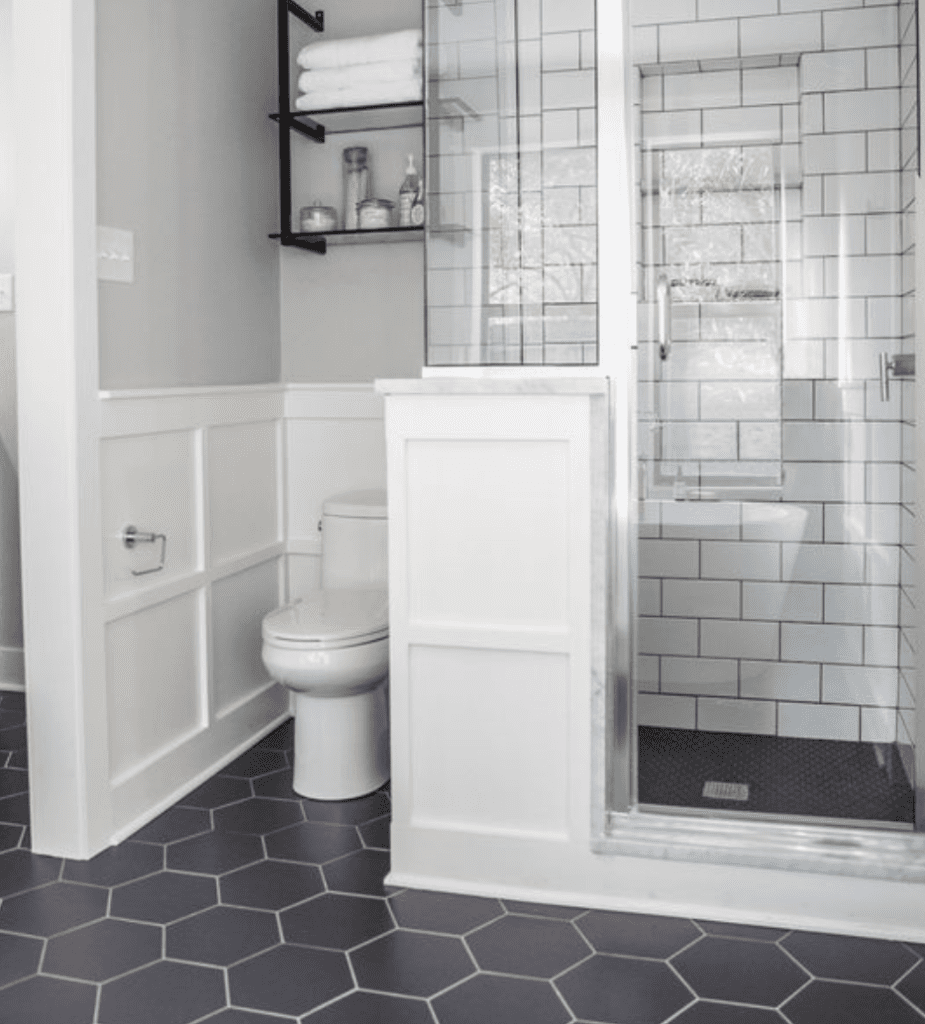
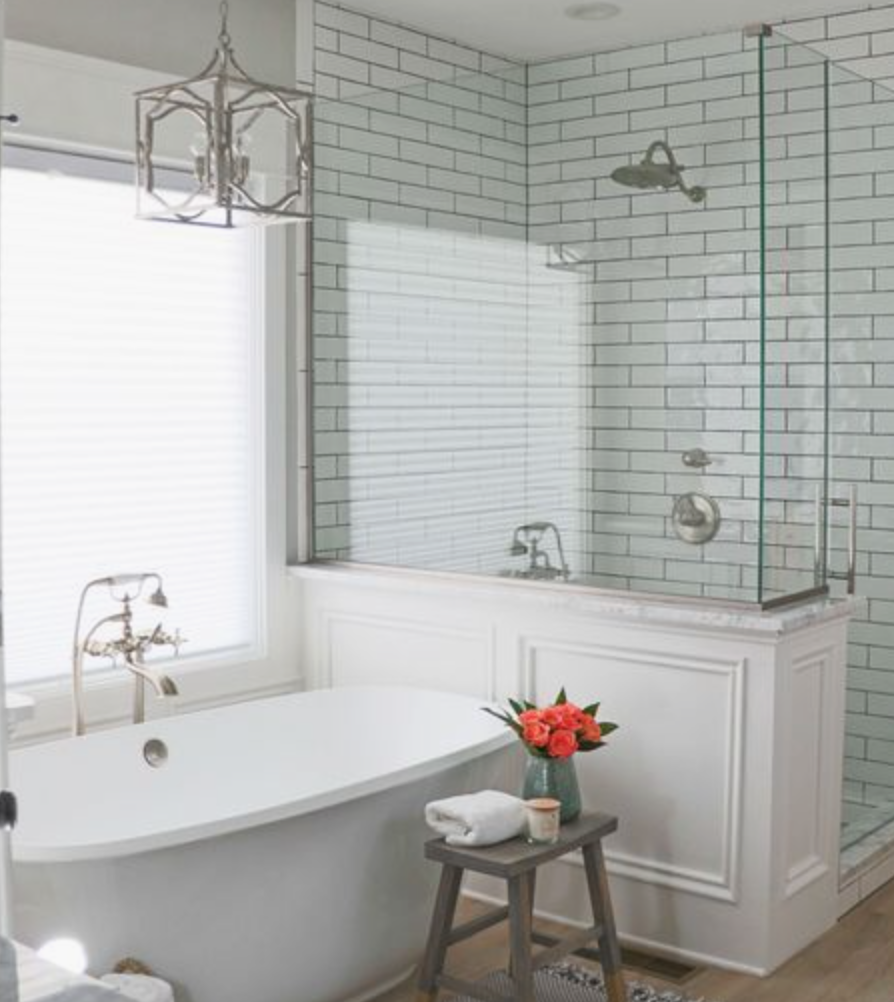
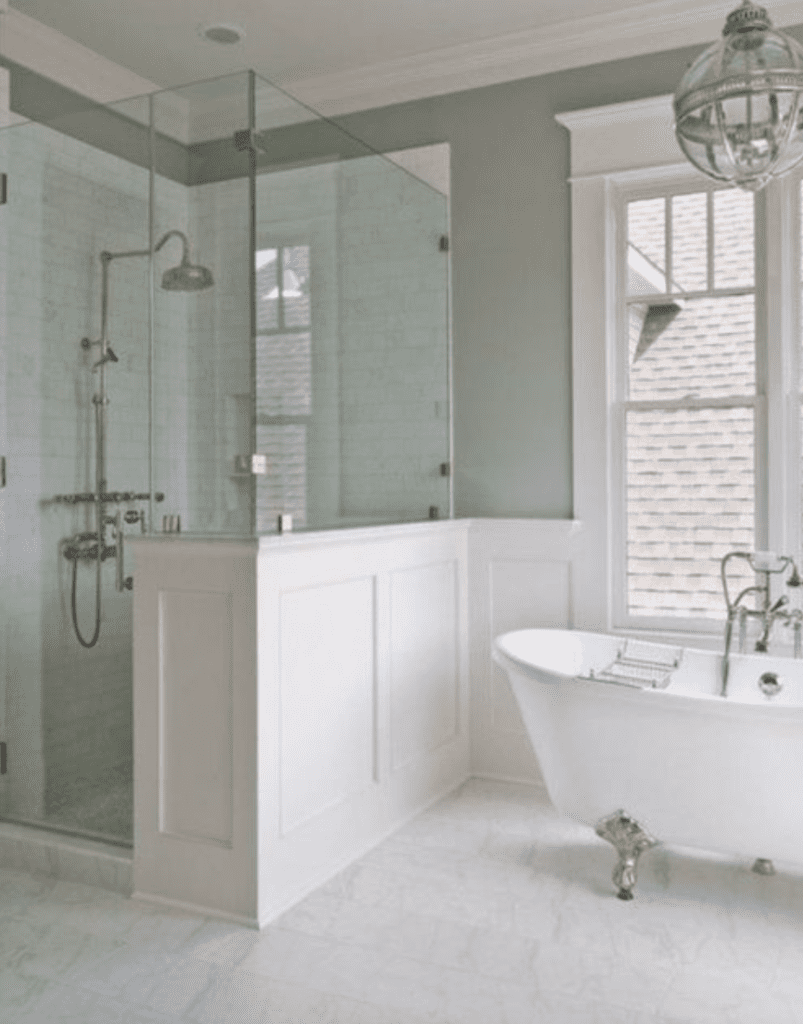
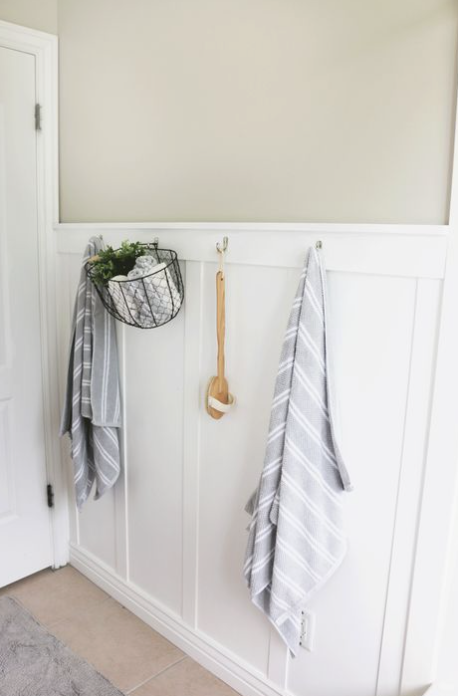
How’s that for some moulding inspo? As you can see from the in progress photos we decided to do a half-wall in our master to give a little separation from the toilet area and shower. We would love to do some type of wood moulding detail. Definitely, in the kids bathroom we are doing a simple board and batten with hooks for towels, painted in Decorator’s white and then a pop of bold color above that.
The reason I’m not doing a color on the board and batten is because I want the kids toilet to blend in with white wood work as it’s the first thing you see when you walk up our stairs. It’s an unfortunate placement for sure, but it’s not something we could afford to change.
Paint Colors:
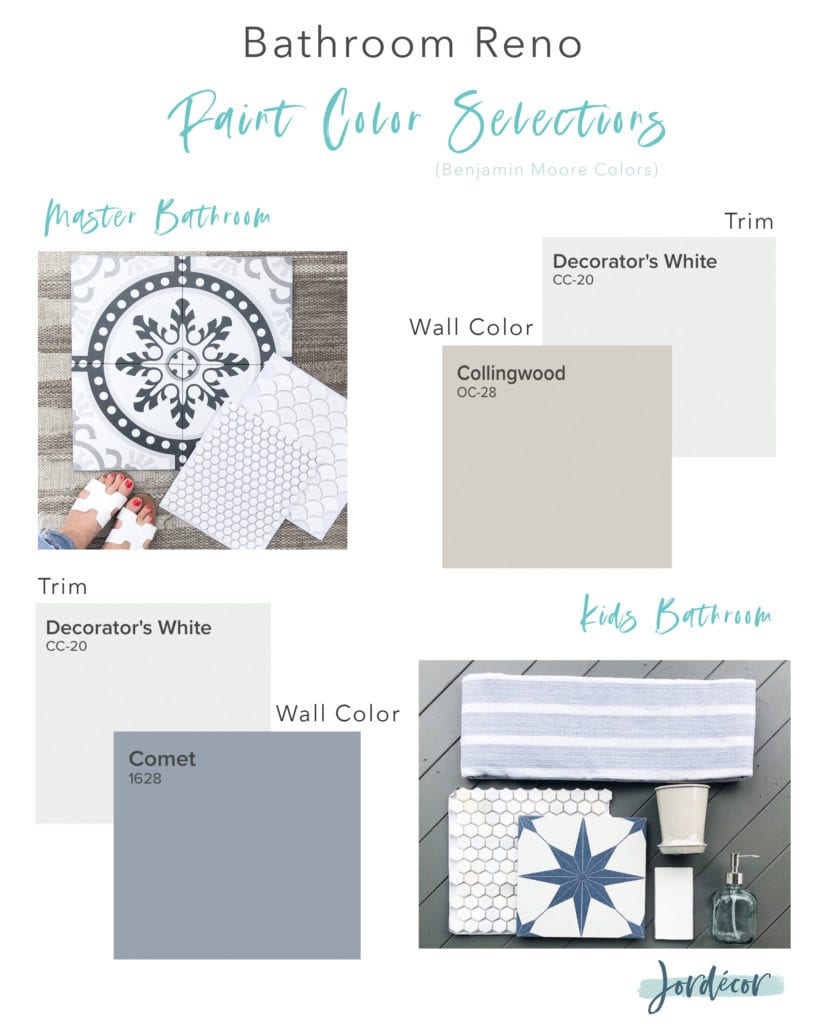
Keep in mind that the paint colors will only be on a the above sections of the wall due to the use of some type moulding (board and batten, etc.) inspired by the above pictures.
I’m so excited about the potential color I chose for the kids bath! I love that it’s called “Comet” and we have a star floor. Promise it’s not an outer space theme! 😉 It’s just a coincidence as I was looking for a bold color with blue/gray almost slate, it also will have a little purple undertone in certain light but since it’s in a kids boy/girl bathroom I think it is perfect. Comet will only be on two small wall sections, it will bring a nice balance to all the white tile, toilet and vanity in the room.
For our bathroom I choose a gray/beige color called Collingwood. I wanted something a bit traditional and neutral but that wasn’t too warm, too cool, too light or too dark. This will make all the white tile and white vanity pop. All the trim and if we do some type of moulding will be in Decorator’s White. Now I just need to decide to add a moulding detail to our toilet nook area or just paint it all Collingwood and move on?
That’s all the updates I have for you now. Thank you for stopping by! I can’t wait to share the final reveal with you all.
Shop this Post

Jordan
read the full post >


")

